First, open the Calendar view in Mailex. To do this, click the tile icon in the upper-left corner next to E-mail, and then click Calendar.
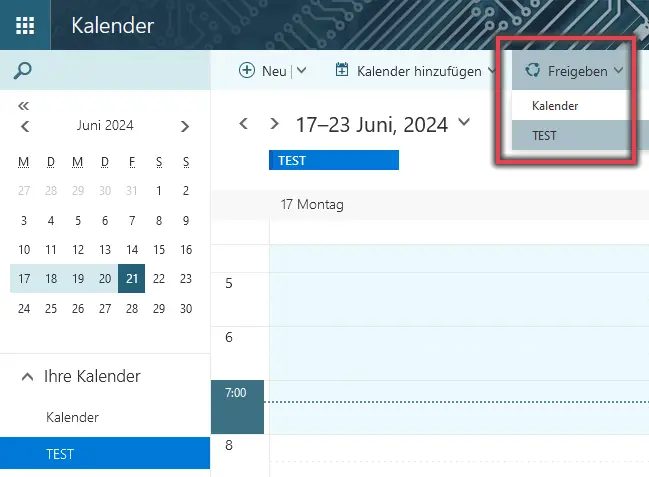
In the calendar view, click the Share tab in the top bar, and then click the calendar you want to share in the submenu.
Figure 1 illustrates the steps described above.
Figure 2: Add a desired person
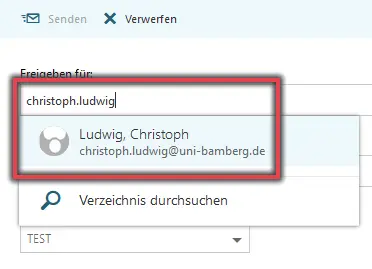
A new window will now open on the right. Here, you can search for and add the people with whom you'd like to share the calendar.
To do this, enter the names of the respective people in the Share with: field in the format firstname.lastname.
The contact with the email address will now be displayed. Click on it to add it.
Repeat the process if you want to add more people.
Figure 2 shows an example of a selected person who is to be granted authorization.
Figure 3: Calendar Permissions
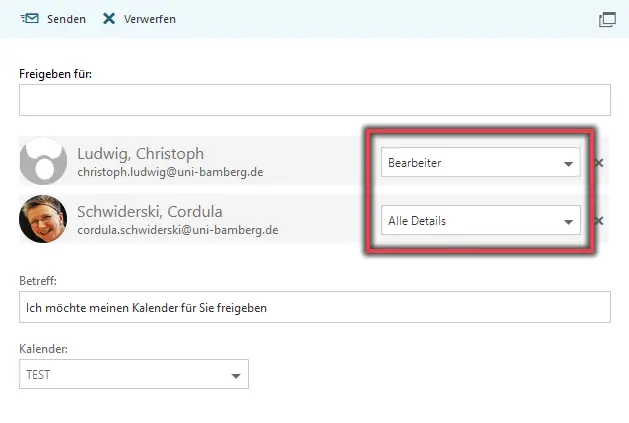
Once you've added all the people you want, you can now adjust their permissions. You can choose between two options here:
All details (Read-only access)
Editor
Figure 3 shows the possible permissions that can be granted.
Finally, click Send, and the authorized individuals will receive an email.
Figure 4: Customize Permissions
Note:
If you want to customize the permissions for the shared calendar in more detail, you'll need to do so in the Outlook desktop app
After adding the relevant people, you can customize their permissions to suit your needs.
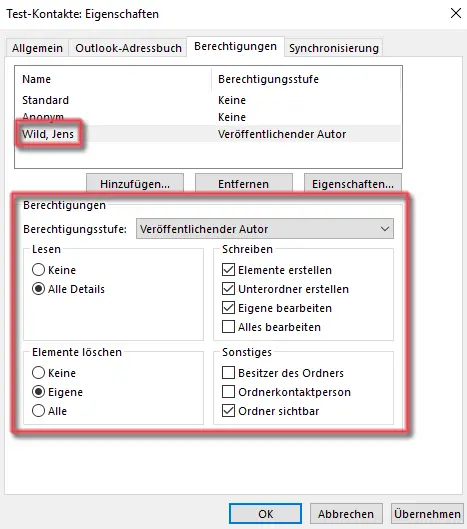
Right-click on the calendar you shared earlier, and then click Properties in the menu that appears.
A new window will open. Click the Permissions tab. Here you can adjust the permissions for each person.
Finally, click Apply and then OK.
Figure 4 shows all possible permission options, such as permission level; read; write; delete items; and others.
Add a Shared Calendar
Note:
In order for a calendar to be added via Mailex, it must first be shared via Mailex. If the calendar has been shared in Outlook, it cannot be added for technical reasons.
Add a Shared Calendar via Email
Figure 5: Add a Shared Calendar
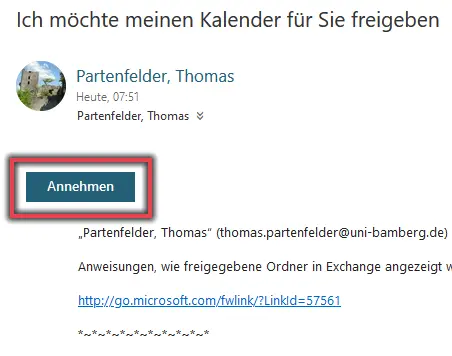
If the calendar was shared via email, you can easily add it by clicking Accept in the email. It will then be added automatically.
Figure 5 shows an email with calendar sharing permissions.
Manually Add a Shared Calendar
Figure 6: Add a Calendar Manually
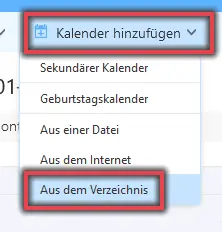
To add a calendar manually, click Add Calendar and, in the menu that appears, click From Directory
Figure 6 shows the menu with the “Add from Directory” option.
Figure 7: Open Calendar
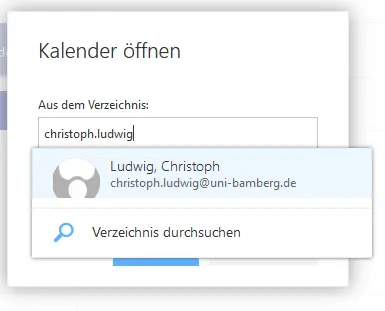
In the new window, enter the name of the person who shared the calendar with you in the format: firstname.lastname. The contact will be highlighted; click on it and then click Open.
Figure 7 illustrates the steps described above.
Note:
You cannot manually add calendars that you have previously created yourself.