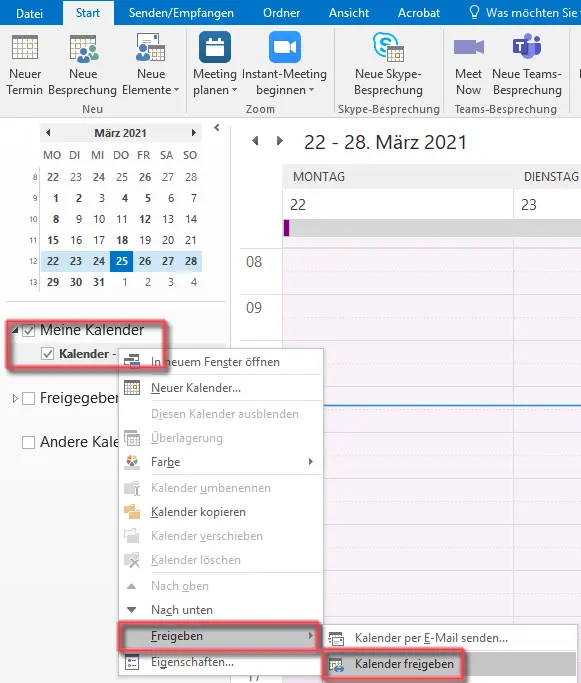
Right-click on your calendar, and in the menu that appears, click Share and then Share Calendar.
Figure 1 illustrates the steps described above.
Figure 2: Add an Authorized User
In the window that appears, use the To field to add the person you want to grant permission to. In the address book that appears, select the Global Address List, add the desired person by clicking To, and confirm by clicking OK.
Figure 2 shows the Global Address List with an example of a selected person who is to be granted access.
Figure 3: Grant Permission
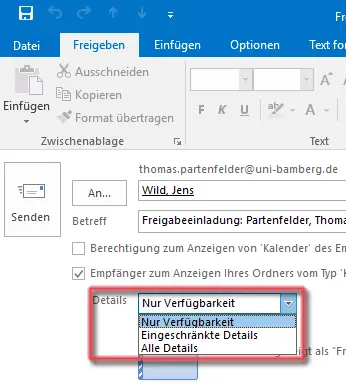
Next to the Details field, you can select the permissions for the calendar. The default setting is Availability Only.
Figure 3 shows the possible permissions that can be granted.
Finally, click Send, and the authorized individuals will receive an email.
Figure 4: Customize Permissions
Note:
After adding the relevant people, you can customize their permissions to suit your needs.
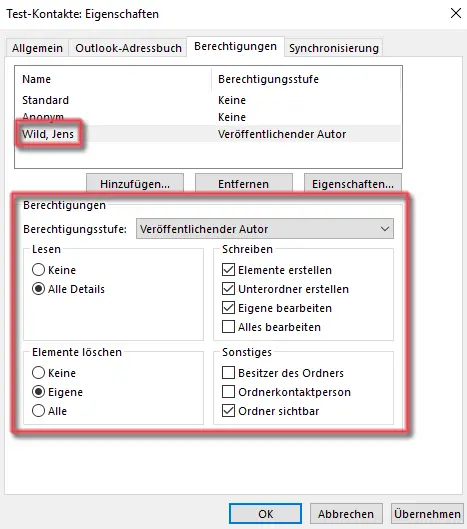
Right-click on the calendar you shared earlier, and then click Properties in the menu that appears.
A new window will open. Click the Permissions tab. Here you can adjust the permissions for each person.
Finally, click Apply and then OK.
Figure 4 shows all possible permission options, such as permission level; read; write; delete items; and others.
Add a Shared Calendar
Figure 5: Add a Calendar
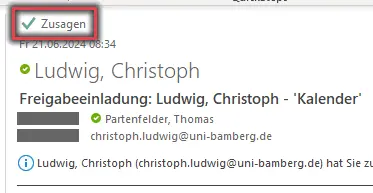
If the calendar has been shared as described earlier under Share Calendar, the relevant people will receive an email.
In the upper-left corner of the email, there is a green checkmark next to RSVP. After clicking RSVP, the event is automatically added to your calendar.