To use the campusprint printing service, you must have a valid user account (BA number + password) and a student ID card or service card.
To set up campusprint and to print using campusprint, your device must be connected to the University of Bamberg’s network, for example, directly via the university’s Wi-Fi or via a VPN connection. For information about VPN at the University of Bamberg, please visit www.uni-bamberg.de/its/vpn.
These instructions are for Ubuntu 26.04 and should therefore work just as well on other Debian-based distributions.
Download the driver
First, download the printer driver(4.2 MB) for the Konica Minolta bizhub C300i copier. Then unzip the driver package.
Installing the printer driver
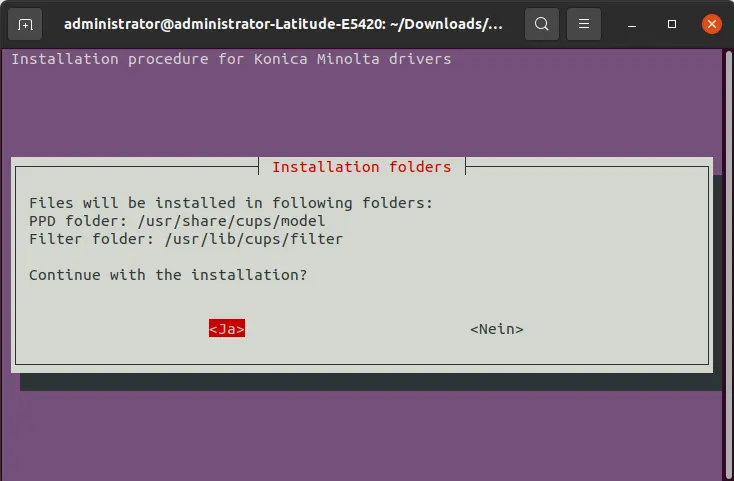
Figure 1: Installation folder
Open a new terminal window and enter the following commands:
sudo apt-get install smbclient cd ~/Downloads/ cd „extracted driver folder“ sudo perl install.pl
Es öffnet sich ein Installationsmenü.
In this window, confirm the Installation folders by clicking Yes.
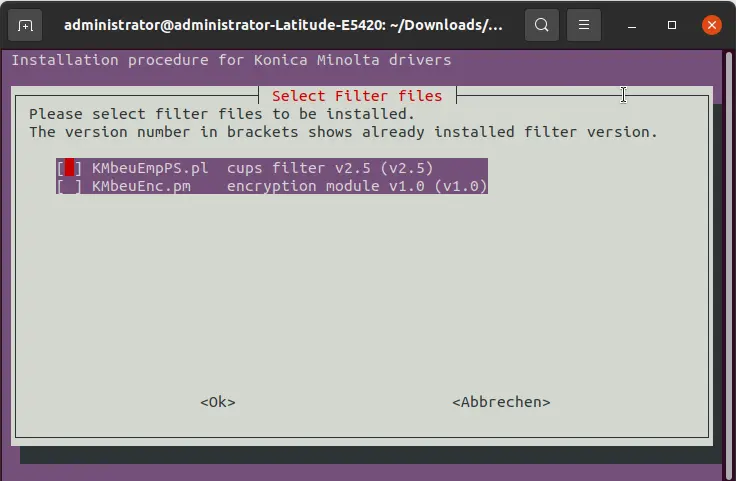
Figure 2: Select filter files
In the next window, Select Filter Files, select the option KMbeuEmpPS.PL cups filter v2.5 (v2.5) and click OK.
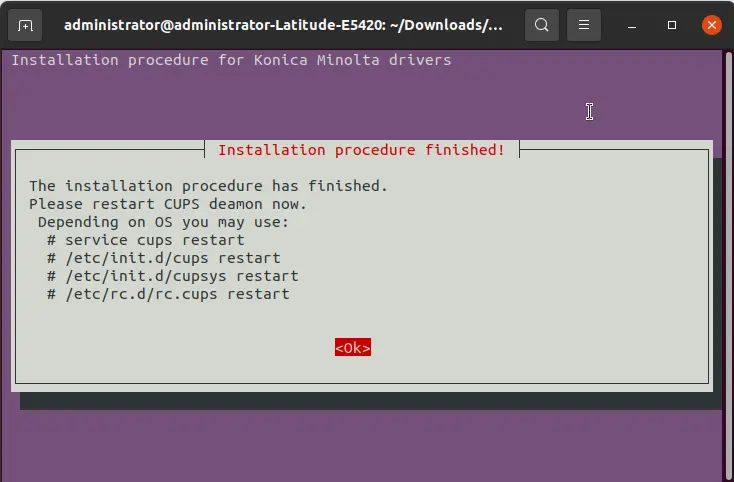
Figure 3: Installation complete!
In the Select PPD files window that appears, make sure all drivers are selected, and then click OK.
The final window: Installation procedure finished! Click OK to finish:
Finally, the cups service must be restarted.
To do this, enter the following command in the terminal window:
sudo systemctl restart cups
Setting up the printer
Figure 4: Settings: Search for Printer
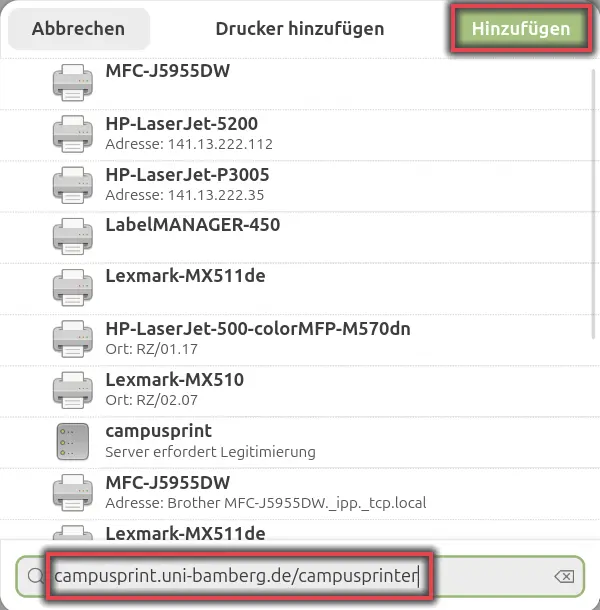
Figure 5: Add Printer Settings
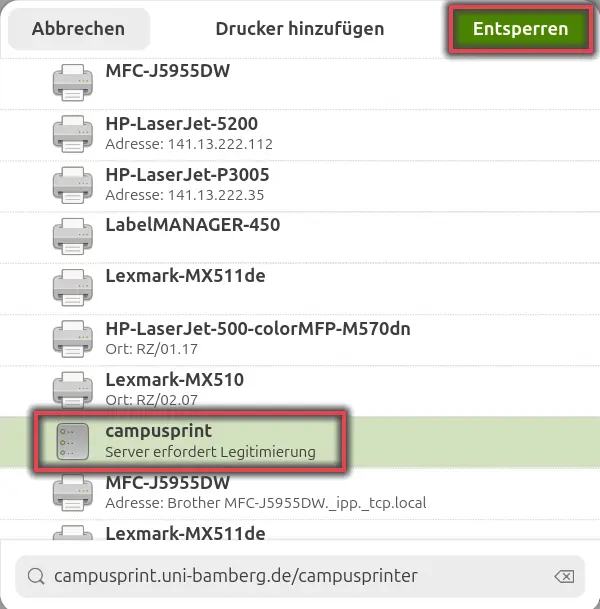
In the settings, click on the Printers menu item. Then click Add Printer in the upper-right corner. Enter campusprint.uni-bamberg.de/campusprinter in the search field at the bottom and press Enter.
Click on campusprint, then click Unlock in the upper-right corner.
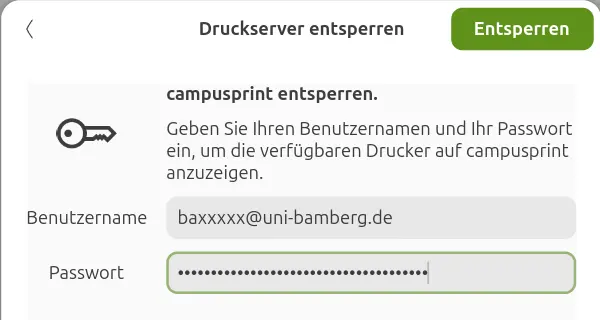
Enter your BA number followed by @uni-bamberg.de as your username, along with the corresponding password, and click Unlock.
Example.: baxxxxx@uni-bamberg.de
Figure 6: Unlock the print server
Enter your BA number followed by @uni-bamberg.de as your username, along with the corresponding password, and click Unlock.
Example.: baxxxxx@uni-bamberg.de
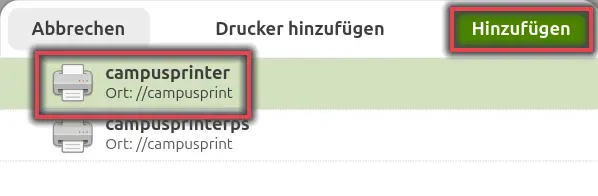
Figure 7: Select and add campusprinter
Now click on campusprinter and then click Add.
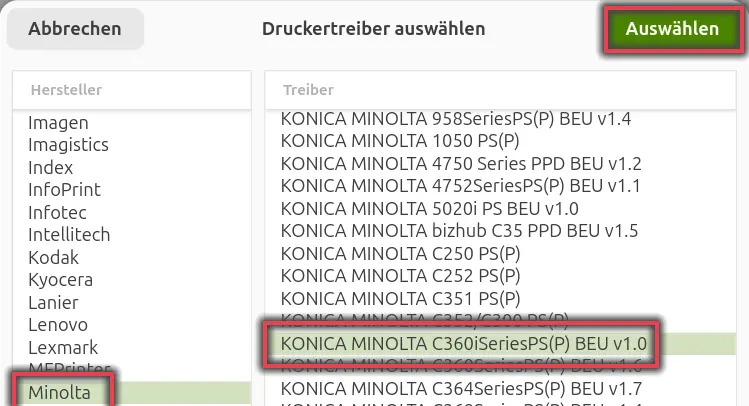
Figure 8: Select Driver
Click on Minolta in the right-hand column. Now you can select the driver in the right-hand column; click on KONICA MINOLTA C360iSeries(P) BEU v1.0 and then on Select. The printer will then be added.
Figure 9: Printer Options
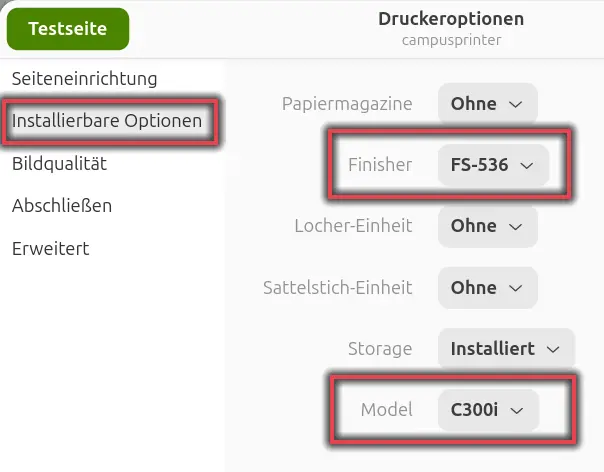
Figure 10: Printer Options / Installable Options
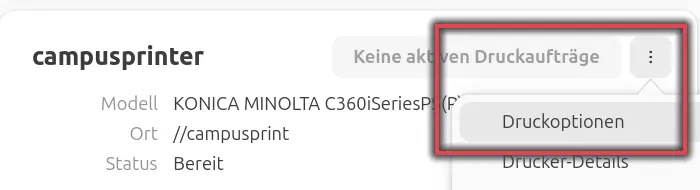
On campusprinter, click the three dots on the right, then click Print Options.
A new window will open; click Installable Options on the left. Select Finisher FS-536 and Model C301i. You can then close the window.
Send print job
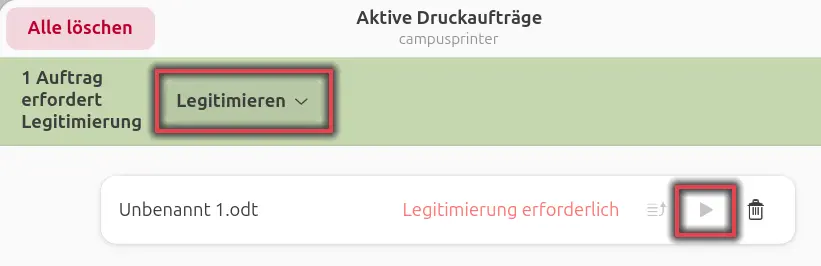
Figure 11: Authenticating a print job
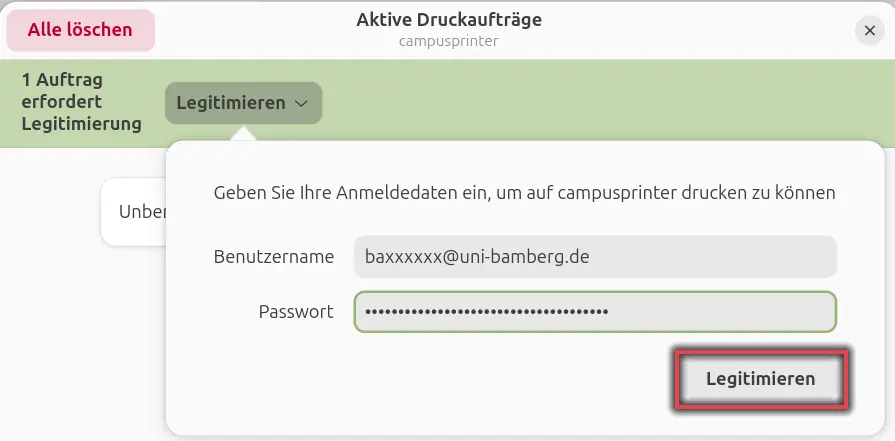
Figure 12: Print Job Login
Print jobs can be sent as usual via the application's print menu.
After the print job has been sent, you will need to authenticate yourself. A window should then open showing the active print jobs.
Click Authenticate here, then enter your BA number followed by @uni-bamberg.de and your password, and finally click Authenticate.
Note! If you don't see the prompt to verify your identity next to the print job, click the Play icon.
Important note:
By default, the printer properties are set to color printing and two-sided printing. If you want to print in grayscale or on one side, you must change these settings manually.