Connecting to a network drive under macOS and iPadOS
Important notes:
To access the file server using a network drive, you need a valid user account (BA number + password).
In addition, your device must be connected to the data network of the University of Bamberg, for example directly via the university WLAN or using a VPN connection. Information about the VPN at the University of Bamberg can be found at www.uni-bamberg.de/its/vpn.
Establishing a connection with the file server
Please do not connect to the network drive through your browser, as this may result in various error messages.
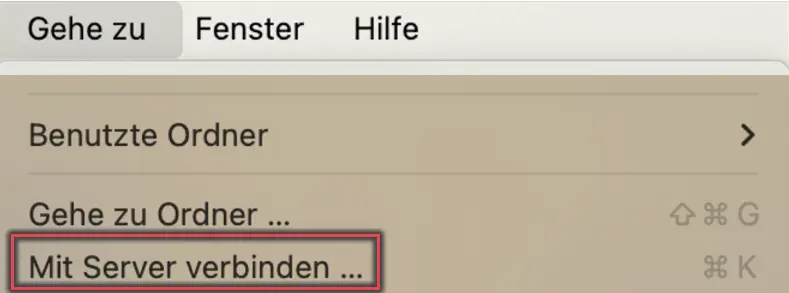
Figure 1: Connect to server on macOS
Open Finder and click on the command Connect to server... in the header bar under the menu item Go to.
Figure 1 shows the previously described way to add a network drive.
Add server address
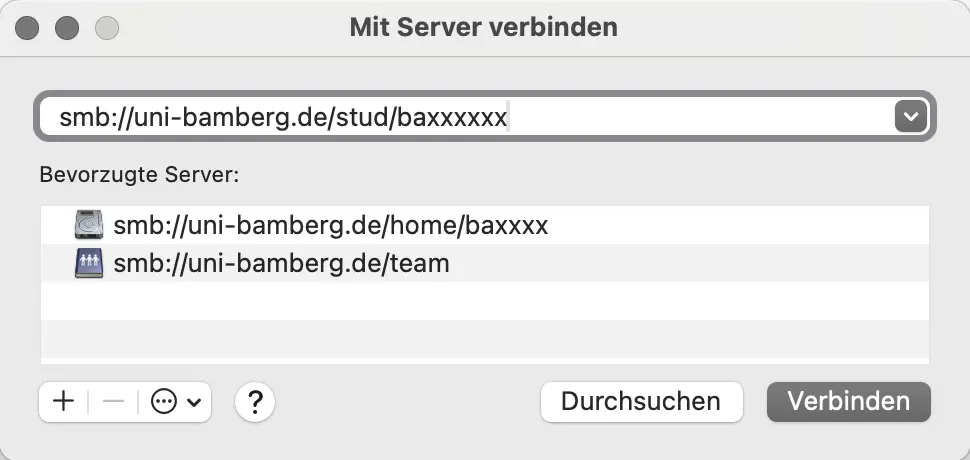
In the following window, enter the path to the desired network drive under Server address:
Network drive for students: smb://uni-bamberg.de/stud/baXXXXXX
Network drive for university employees: smb://uni-bamberg.de/home/baXXXXXX
To simplify the connection setup in the future, you can add the entered server address to the list of preferred servers by clicking on the + button at the bottom of the window.
Then click on Connect.
Figure 3 shows the method described above, with an example of a student network drive.
Figure 3: Input network drive
Authentication on the network drive
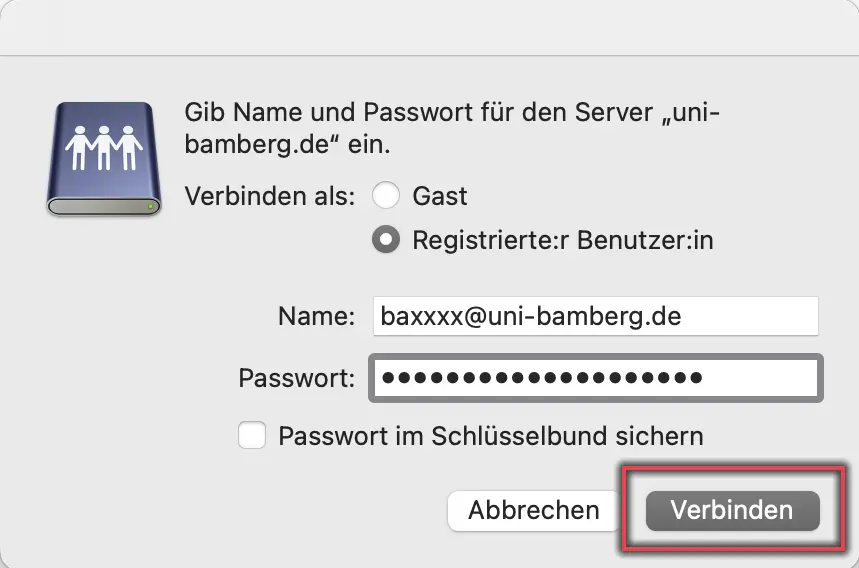
Figure 4: Entering login data
In the next step, you will be asked for the data for your user account in order to be able to log in to the network drive. Please complete this window as follows:
Connect as: Select registered user option
Name: BA-Nummer@uni-bamberg.de
Password: Password of your BA number
Finally, click on the Connect button.
Figure 4 shows the login window with an example of how to enter the login name and password.
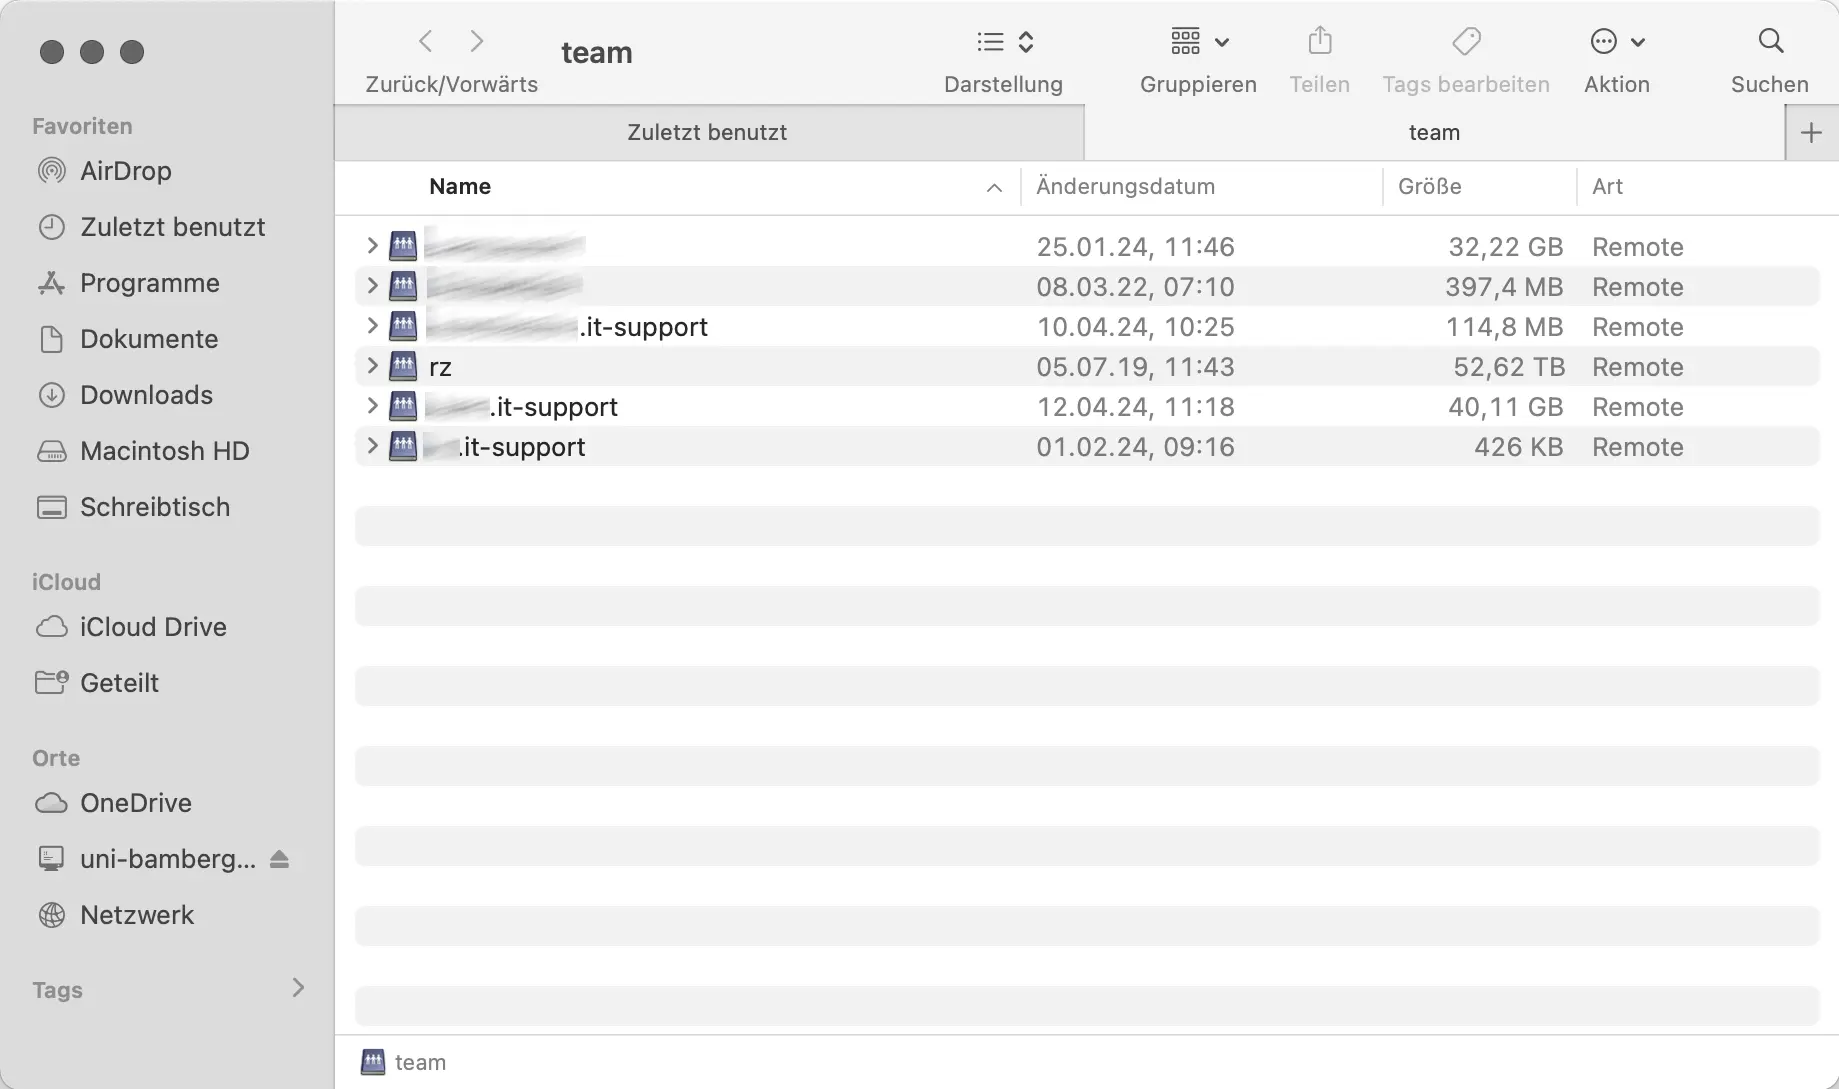
Figure 5: View of network drive contents
After logging in, you will find yourself in your personal folder or your team folder of the university network drive.
Figure 5 shows the view of the team drive with content.
Note:
If you mount the task-related network drive smb://uni-bamberg.de/team, all your task-related network drives are automatically mounted in it.
Eject network drive and terminate connection
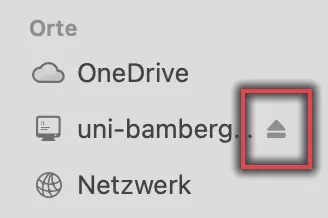
Figure 6: Disconnect network drive
To terminate the connection with the Uni network drive correctly, please first eject the drive via the Finder.
To do this, click on the eject symbol. You can then - if no longer required - disconnect the VPN connection to the university network.
Figure 6 shows the connected network drive with a mark next to the eject button.