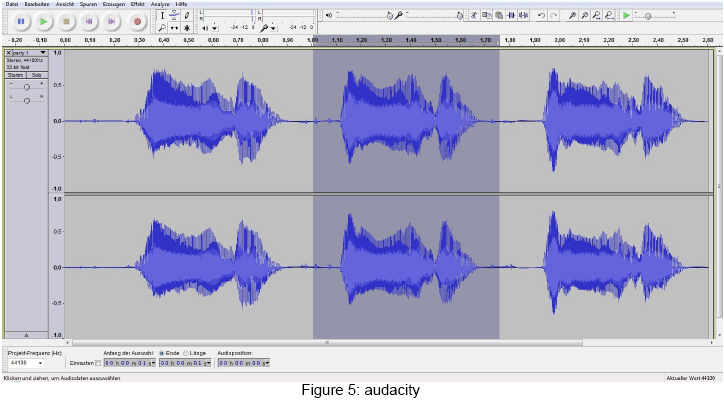
The next step after you conducted your recordings is to edit your sound files. If you have recorded a text which consists of more than one sentence, you might want to split the file. You can work more easily and faster on files which contain only one sentence. Just load your file into audacity, mark the respective part of interest, copy it and open the new part in a new audacity window. Now the new file can be saved as a .wav file. For the analysis in Praat it is essential to have all recordings in .wav form. No other file type is supported by the program.
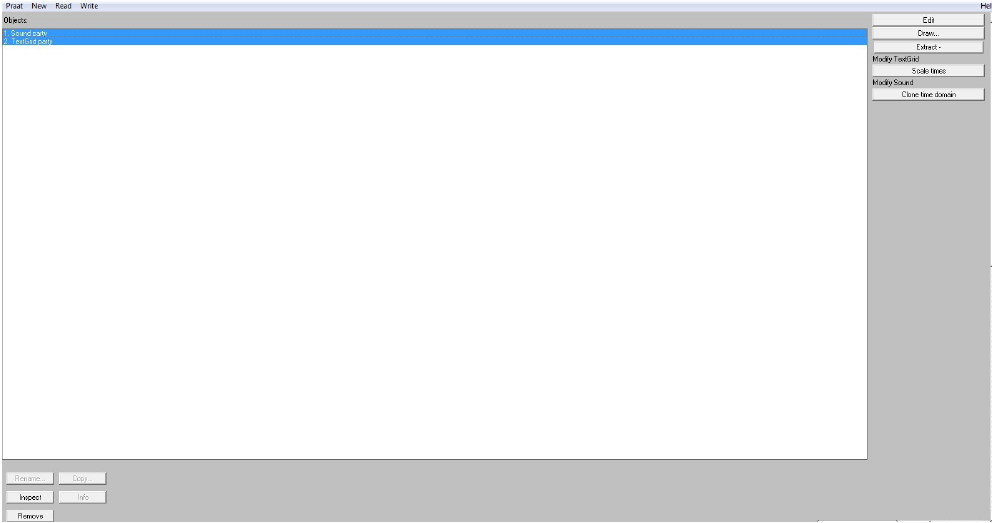
Now that the sound file is in an adequate size and in .wav format you can open it in Praat. Start Praat and click the “Read” button in the top menu. Then click on “read from file” and open your sound file. Your file will now appear in the “Objects” window.

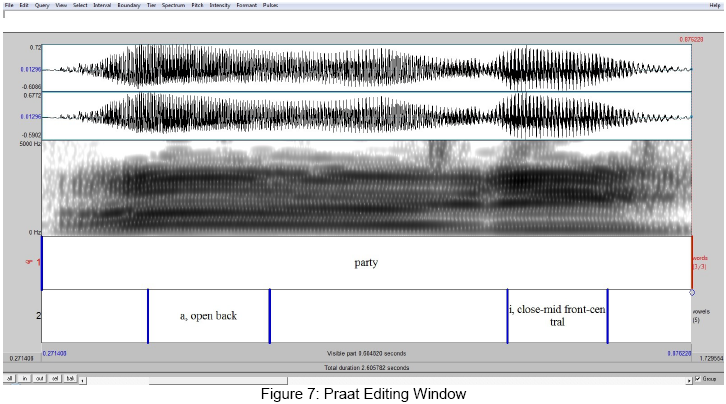
First, click on your file and then on the “Edit” button in the right hand menu. You will see your sound file in the standard Praat editing window. Zoom in with the buttons on the lower left half of the window. Now you can see the waveform and below the spectrum of the sound file.
Before the work with Praat can begin, we need to look at an important feature of the program. Back in the objects window, mark your sound file again and click on the “annotate” button on the right hand menu. Choose “annotate to TextGrid”. This action will provide additional space for notes in the editing window. Type in names for the additional lines in “All tier names”; for example, “vowels” for a line where you note the spoken vowels, and “words” where you note the spoken words. The editing window will open again and you will see the sound files' waveform, the spectrogram, and the annotation lines you inserted.
You can add boundaries in your annotation lines in order to distinguish where a word or sound begins or ends. To do that, mark where the sound starts in the wave form window. A vertical red line will appear at the point you have chosen. Click on the “Boundary” button in the top menu and choose the tier in which you want to add your boundary. Do the same where the sound ends. By clicking into the space between the two boundaries you can add notes to that part of your wave file. Make sure you save your file before closing. To save the TextGrid just click on “file” and then “Write TextGrid to File”.
Created with the Personal Edition of HelpNDoc: News and information about help authoring tools and software